


Back to Books in the Classroom - How to use them in class.
- Susan de Lautour
- Apr 23
- 5 min read

Updated: Apr 24
Getting “back to books in the classroom” is the latest catch-cry as educators realise playing mix and match and filling in gaps with online worksheets doesn't help students a whole lot. Old-school teachers like me never left them. There’s certainly a place for technology, and I embrace it for research and longer writing pieces that students are taking time to craft.
So, it’s back to books because:
Just as we learn to speak by listening, we learn to write by copying (yes, and of course, reading). Yes, copying notes from the board is valuable.
Students need a tangible set of notes – something they can hold in their hands to:
Study from – to memorise and understand.
Be able to say, “look at all my work” because, if you can’t see it…did it really happen?!
Sadly, in so many classrooms many students have nothing but a scattered lot of Google docs to show for their work and learning.
Note-taking is a skill students need to learn.
Spelling and writing grammatically correct sentences is best learned on paper.
Teachers marking bookwork is THE best way to get to know students’ abilities and needs. And when students know their work will be checked it shows them that it actually does need to be completed and that it is important!
Teacher notes and stickers foster relationships.
With books we can teach students about presentation, organisation and managing their resources.
Keep students' books in the classroom – make collection, storage and distribution in each lesson an important ritual. Treat books as a treasure, a mark of professionalism.
If senior management pops in every now and again and glows over books, no matter how old students are, this reinforces seeing themselves and their work as important. Isn’t this the ultimate goal? Senior managers, you MUST get out of those offices!

So how DO you use an exercise book? Let’s go!
Title pages

Let’s bring back the title page! Why? Title pages:
Divide areas of study – students feel organised and it helps them understand the parts of our subject.
Send a clear message: we are starting something new. Lets go!
Title pages offer some downtime for students and you. We need something meditative in our classrooms, so pick your time for maximum effect. Last period of the day, or straight after lunch are good times to add a little Zen! (In all seriousness, in this crazy world of ‘instant’ our students need this.)
I write on the whiteboard what I want students to include – things like: text type, topic, title, author/poet/director.
Tip! Have students leave space for further symbols/graphics that they can add once they’ve learned more about this area of study (eg: symbols, depictions of setting, a key quote). Returning to their title page to do this helps consolidate learning.
Adding tabs

Adding tabs down the side of an exercise book:
Helps students see ‘at a glance’ what they have covered during the year.
Helps students find what they need.
Makes books look more professional, giving students more pride in their work.
Note: For seniors (years 12-13/grades 11-12), I must admit, I prefer an old-fashioned ring binder with dividers because we tend to move back and forth between different areas of our study, so these make it easier to slot new pages in anywhere. (This is why those clear pocket folders are hopeless – things get plonked on top of each other AND students can’t easily add to or annotate notes. Ugh!

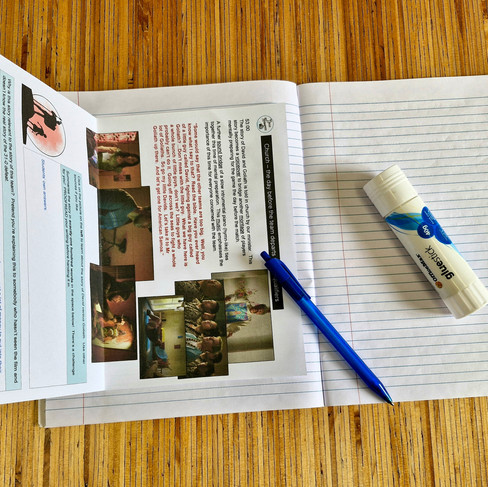
Avoiding the ‘cut and glue’ fiasco! LOL.
Sometimes, you need students to glue something into their books. The first time you do this with a class, you’ll discover that many of your students missed out on a bit of art and craft in their younger years! Yes, even at high school – cry! It’s worth stopping everything for ten minutes to teach basic skills with scissors and glue!
Trim something to fit the width/length of their book.
Glue the back of a piece of paper without spreading it everywhere.
How to glue something in so it looks straight!
How to glue the top half of a large sheet, then fold it in half to make it fit


Inside the front and back covers
The inside front or back covers, or the first and last page can be set aside for things like:
The class year plan.
Graphs to chart quiz scores.
Other administrative reference sheets.
Remember this as you set students' books up with them at the beginning of the year.
That ‘yukky’ page.
Who likes writing on that left-hand page? The one that has all the writing coming through from the other side? I never did, so when students ask me if they can leave that page, I let them! Who cares?! The work is still getting done, and it shows me that students are enjoying making their book look nice.

How to ‘do it’
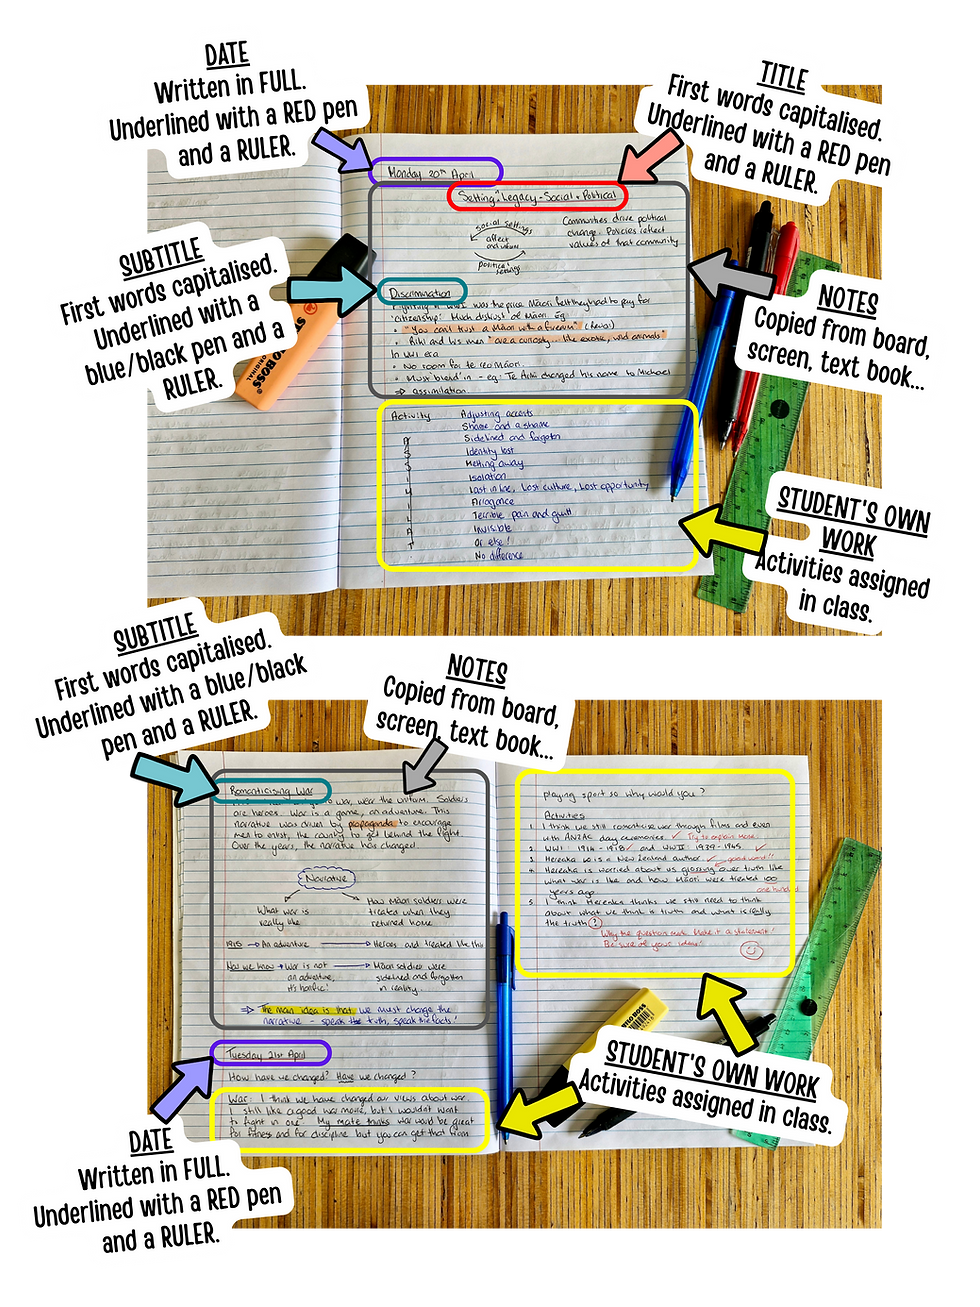
So how do you do it? How do students use their books for classwork? I’m a stickler for professionalism, so see the rules and the formatting below.
______________________________________________
UNBREAKABLE RULES
Your book is a taonga (treasure) and should be treated as such.
Never EVER rip a page out.
Never EVER throw your book across the room.
Mistakes are EXPECTED. They should be crossed out with ONE NEAT LINE.
Books must be formatted correctly.
Messy work is redone.
Use a blue or black pen.
______________________________________________
ALSO (cry), some students must be told:
To work through pages from left to right. FACTS.
To finish one page before beginning the next one.
To line their writing up against the margin.
Managing your marking
Remember, there is NO POINT in students completing an activity if you are not going to look at it! They’ve already worked this out! (No, I don't mark everything students do - it's impossible - but that's a wee slogan I say to myself to encourage me to lift my game.)

Sticker ahead:
Place a sticker 4-6 pages ahead of the last lot of work you marked (it will depend on the student – you’ll know how far ahead once you get to know their work). When the student reaches the sticker, they hand their book in. At the end of each lesson, in a class of 30, you might have 4-5 books to go through.
If you've moved around the room checking/marking as students work, then there'll be less to do!
Mark in class:
Move around the room, checking and marking and writing little reminders in students’ books as they work. Doing this cuts down on your marking load when students do hand their books in AND it catches them ‘while they’re hot’ – ie, when they need that guidance most.
Tools:
Use a red pen or something equally bright. Students need your marking to stand out.
Get some stickers – heads of departments, help teachers out with a ready supply. Even the seniors love stickers (I would argue especially the seniors – hehe)!
There’s another neat trick where you can highlight students’ work – green for ‘mean’ (as in good) and pink for ‘stink’. (I used to say pink for ‘think’ but my students, seeing it for what it is (come on, now) rename it every year to ‘stink’.) I’ve never found this sustainable, though, and I hate the way the highlighters go through to the next page. Having said that, I’ve seen some students have great success with this and it IS good for ‘one-offs’.


STAY IN THE KNOW!
✿ Subscribe to our YouTube channel
✿ Follow us on TikTok
✿ Follow us on Instagram
✿ Follow our Facebook page
✿ Follow us on TPT.
📬Add some joy to your inbox📬
🥝 NZ Teachers, click here to subscribe for teaching tips and our latest products (or log in to the website then you can access our Freebies library too)!
🌎 Teachers from other parts of the world, click here to subscribe for teaching tips and our latest plus get instant access to our bank of freebies!


Comments